Is it essential to repair your electrical tools? Yes, it is. Therefore let’s learn why it is essential to maintain and repair your electrical tools and how you can do it.
The electrical industry is rapidly growing and there are many new advancements in it. The latest technologies help to reduce the workload and, do you work with more efficiency. Therefore the electricians use tools to ease up their work. Then you need to know how to maintain and repair your electrical tools. But, if you are an amateur in the electrical industry, first and foremost you need to get to know, what are electrical tools?
What are Electrical Tools?
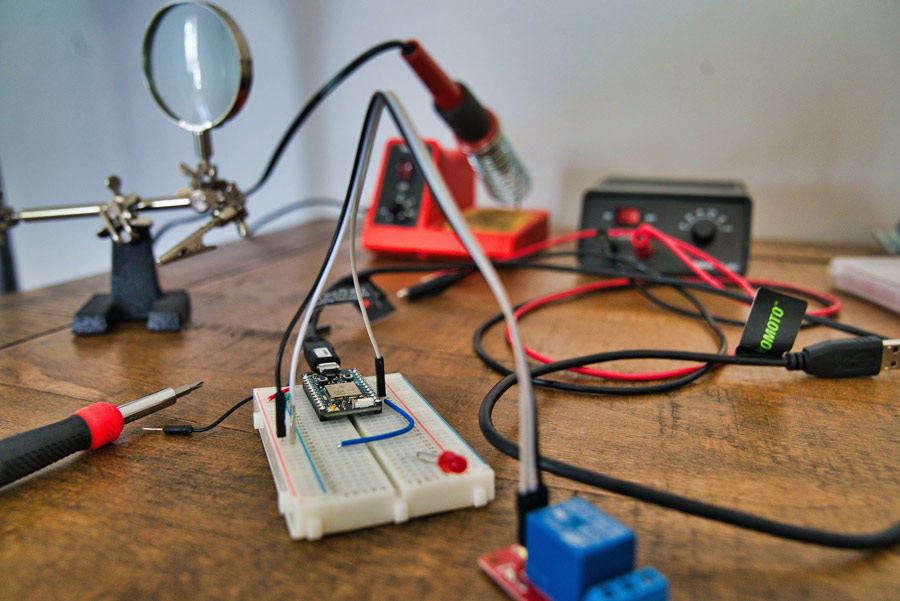
Electrical tools are the tools and equipment which are necessary to work on an electrical system. Electrical tools are necessary for a wide range, from massive construction projects to small scale, household electrical repairs. Therefore, tools are the best companions of electricians. The electrical tools enhance the craftsmanship of electricians. The tools bring life to the designs and creations in your mind. They convert the creativity within you, to a reality. The high-quality tools can transform a cumbersome, unwieldy project into a manageable task.
Types of Electrical Tools
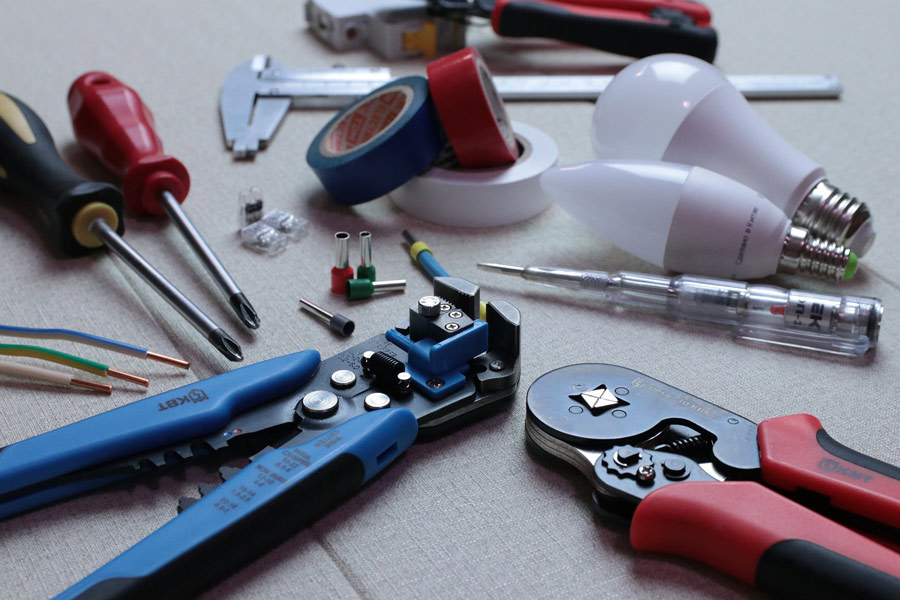
There are various types of electricians, similarly a wide range of electrician tools as well. Screwdrivers, wrenches, pliers, tape measure, wire strippers, ammeters, multimeters, electrical drills, impact wrenches, etc. When you consider these tools, you can see a major difference. That is some of these tools use man-power, and some tools require electrical power. Therefore we can refer to these two types of tools like hand tools and power tools.
What are Hand Tools?
Hand tools are the tools that do not need an external power source to operate but need manual effort to work. Since motor power is not necessary to run them, these tools can be used anytime, anywhere by almost anyone. Different types of manual hand tools include hammers, pliers, manual saws, screwdrivers, and wrenches. The hand tools have their own set of pros and cons. Hand tools do not produce a loud noise when they work, unlike power tools. Hand tools are comparatively lightweight. Hence they are easily portable. However, hand tools are not as much as efficient and fast when compared with power tools.
What are Power Tools?
Power tools require a power source to operate them. Mostly the power sources used are electricity or battery power. Power tools can operate automatically without human intervention. Power tools have motors and other mechanisms that make them efficient and fast. Thus they are way more speedy and powerful than hand tools. The power tools are fast therefore they are capable of doing work with less time increasing the efficiency of your work. They increase the accuracy of the work. The tasks which seem to be nearly impossible or time-consuming are handled easily with power tools.
But power tools have some cons too! Power tools rely on external power sources. Therefore unlike hand tools if there is no power the power tools collapse. As there are more mechanical components the power tools are prone to damage and failures often than hand tools. Power tools are efficient than hand tools, nevertheless, they produce a large noise when operating.
Which Tools are Better?
There is no definite answer to the question, whether you should buy hand tools or power tools. The type of tools differs according to your necessity, affordability, and conditions of your working site. Therefore it is advisable to have hand electrical tools as well as power tools in your tool collection in order to use them when necessary.
There are many best brands of tools available for electricians in the market. Yet, it is not adequate just to buy a good set of tools. Indeed you need to repair and maintain them. The period of time the good quality of the electrical tools persists is directly proportional to the way you maintain and, repair them. If there is no proper maintenance, even the best-branded tools might be defective and mal-functional within a while. Therefore. remember: Maintaining and Repairing your electrical tools is essential!
What is Repairing of Electrical Tools?
Repairing means the process of restoring a damaged or worn-out thing, which can be an object or equipment back to good condition. It is essential to repair the faults, cracks, and breaks in your electrical tools to prevent them from being unusable. Consequently, if you provide a proper repair to your tools, most of the broken and worn out tools can be brought back to life. It is highly economical and in most instances, you can save the expenditures for buying new tools. In addition, repairing allows you to reuse materials and tools thus making you obtain the maximum benefit from them.
What is Maintenance of Electrical Tools?
Maintenance is another aspect of taking proper care of your electrical tools. It means taking steps and measures to continue something in the best condition. Maintenance of your electrical tools can prevent them from getting worn out soon. Thus maintenance can make your tools persist in good condition for a long period of time.
Let’s see what are the benefits you can gain if you maintain and repair your electrical tools.
Why do You Need to Maintain and Repair Electrical Tools?
Electrical tools are the best companions of electricians. Even though the tools are inanimate, they need proper maintenance and repair. But it is one of the things that we often do not pay much attention to.
When you work hard all day you get tired and exasperated. Good food, rest, and sleep can wash away the tiredness and refresh your mind and body. Afterward, you can pursue your work fervently. What would occur if you continue to work without getting freshen up disregarding the tiredness and fatigue? The weariness and exhaustion can decelerate your efficiency and, you will end up being sick. So it is the same with electrical tools too. Even if the tools are inanimate and lifeless, they too need to be properly taken care of. If the tools are in the fine condition they can keep on working over a long period of time. The maintenance and repair is the key to keep your electrical tools functioning for years and years. If you take proper care of your electrician tools, they will favor you in return!
Yes, Your Tools Matter!
If your electrician tools are not in good condition, they would malfunction. Then it would be time-consuming to fulfill your projects. This can lead to a decrease and drain the efficiency of your work. Indeed, short-term tasks and projects might stretch over unexpectedly resulting in you losing enthusiasm with contempt. You lose enthusiasm for your work, not because you lack the skills but because of the defective tools. Accordingly, the best tools can enhance the craftsmanship within you. Yet the defective tools might make the easiest tasks seem tedious. Therefore it is essential to repair and maintain your electrical tools, in order to keep up your self-esteem, self-contentment, and efficiency.
If you maintain and repair your electrical tools properly it can help them to persist in good quality over a long period of time. If your electrical tools remain in good condition they can give a qualitative finish to your work. Accordingly, you will be able to meet the expectations and standards of clients while offering a high-quality service. Therefore maintain and repair your electrical tools to advance the quality of your work!
Why You have to Maintain and Repair Your Electrical Tools ? There are More Reasons.
In the electrical industry, it is your skill and craftsmanship that makes you distinct and unique from the rest. The more you work the more will be your gain!. Therefore as an electrician, you have to work efficiently meanwhile creating attractive and quality results. Thus this would be a headache if your tools are not in good condition. Then your work will slow down decreasing efficiency. The tools which are maintained and repaired properly can increase your rate of work. Then you can work more and obviously, earn more! In fact, the state of your electrician tools can affect your income!
If you do not maintain and repair your electrician tools adequately, they become defective and then they malfunction. Then you have to replace them with new tools to continue your work. However, if you properly repair your electrician tools they can retain their functionality in a sound state. Then you are able to use your electrician tools and get the maximum out of them over a long period of time. Hence you can save yourself from the expense of buying new tools often.
Indeed, it is beneficial and economical to properly maintain and repair your electrician tools. So now, let’s consider how to repair your electrical tools.
How to Maintain and Repair Electrical Tools?
Maintenance and repair are two processes that aid you to retain the good condition of your tools. If you continue maintaining the sound condition of your tools, then the need for repair is rare. Therefore let’s consider what you should know when it comes to the maintenance of electrical tools.
Ways to Maintain Your Electrical Tools
There are several ways to help you maintain the good quality of your electrical tools. The mains among them are as follows.
- Cleaning of tools after use.
- Proper oiling and greasing of tools(Proper lubrication)
- Proper storing of tools
- Inspect tools for wear and damages
Let’s get to know about these factors. The way of maintaining differs from one tool to another. Therefore tool maintenance has to be done with care. Otherwise, your effort for maintenance might end up breaking or damaging the tool.
1. Cleaning of Tools After Use
Cleaning is essential for the proper maintenance of tools. After each use, the tools have to be cleaned well. The dirt and grime accumulate in the tools. The wooden dust, cement dust, silica dust in working sites accumulate on the surface of tools. Then it leads to the loss of metallic lust from the metallic pets of the tools. The dirt and dust can cause the colors to fade away thus making tools look so dull and dim.
If the tools are not cleaned properly, the moisture can cause the formation of rust and various oxides on the surface of metallic parts in the tools. Then the tools corrode and they lose strength and durability. The moving components in tools might not function properly due to rust and dust. Then the tools might gradually become defective and you have to eventually replace them with a new set of tools. Therefore just the simple habit of cleaning your tools after each use keeps your electrical tools as well as your money, safe!
How to Clean Your Tools?
You can clean your tools in various ways. But the way of cleaning differs from one tool to another and it depends on the nature of the tool.
a) Water and Detergents
- The most common way of cleaning electrical tools is the use of water and an appropriate detergent. Electrical tools that do not contain batteries and electrical circuits and screwdrivers and wrenches, etc., can be soaked in lukewarm water. If not you can use cold water instead. If there are oil or grease stains, etc., you can use a suitable detergent along with water to clean the tools. In fact, the detergent can be an all-purpose cleaner, a stain remover, or regular soap.
- Use a scrub or a wire brush to remove the remaining debris and rust from the electrical tools. Scrub lightly on the surface of the tools otherwise, it can cause scratches and bruises in the electrical tools.
- Use gloves if necessary to protect your hands from sharpened edges or pointed tips in the tools.
- Rinse the tools and dry them with a towel to remove any additional moisture remaining in the tools. Keep the tools aside to air dry.
More Facts!
- It is a little tricky to clean your power tools. Electrical tools such as electric drills, ammeters, etc., and the tools that contain batteries and electrical circuits, should not be submerged in the water as it can damage the tool. Hence you can carefully wipe off the dust with a wet piece of cloth, without letting the batteries or circuits to contact with water. If not, you can use an evaporating cleaner for cleaning these types of tools. If you can remove the batteries from power tools, remove them prior to cleaning. It is essential to know that before you do any cleaning and unplug power tools from the power supply.
- Is it adequate if you clean only your toolset? How about the box or package that you use to place your electrical tools? The toolboxes, packages, and bags in which you place the tools should be cleaned as well. In addition, the belts, strips, etc. in the toolboxes and bags should be clean. You can simply take out all the tools inside the toolbox or bag and wipe the box and containers. Unless your efforts will be in vain as your electrical tools might degrade in quality even though you clean them daily. Therefore not just the tools, but the bags and packages themselves should be clean. Thus, keep your tools as well as their surroundings clean!
Holikme 20Piece Drill Brush Attachments Set, Scrub Pads & Sponge, Buffing Pads, Power Scrubber Brush with Extend Long Attachment, Car Polishing Pad Kit
This is a 20-piece drill cleaning attachment set (brushes, scouring pads, and scrub sponges), includes 6 various shapes of medium drill power scrubber brushes, 9 different stiffnesses scouring pads, 3 piece scrub sponge, 4-inch backer, and 1 extension rod. With this toolset, it would be pretty easy for you to maintain and repair your electrical tools.
Rubbermaid Deluxe Carry Caddy for Cleaning Products, Spray Bottles, Sports/Water Bottles, and Postmates/Uber Eats Drivers, Black (FG315488BLA)
Here is another tool that we suggest to you. This is 16″ in length, 11″ in width, and 6. 7″ in height. For factors like ease of use, ease of cleaning, durability, sturdiness, and value for money are some of the key factors for which this has received good ratings on Amazon.
DK SONIC Ultrasonic Cleaner with Digital Timer and Basket for Denture, Coins, Record, Daily Necessaries, Lab Tools, Metal Parts, Carburetor, Brass, Auto Parts, Engine Parts, etc (2.1L, S)
This tank and basket are made of heavy-duty stainless steel. So, there is actually nothing to worry about the durability of this tool. The buyers of this product have appreciated this item a lot on Amazon reviews. Because of this, we recommend this to you.
b) Specialized Machines for Cleaning Tools
It is not advisable to use water for cleaning some electrical tools as if they might be defective if their circuits or batteries get in contact with water. In such instances use a can of compressed air to clean the accumulated dust on this equipment. It is also referred to as ‘Gas Duster’ or ‘Canned Air’. The compressed air can be used to clean and dust the nooks and corners in the electrical power tools that cannot be cleaned with water.
Air compressors work by sucking in the outside air, storing them in a tank, and spewing out air at high velocities when necessary. In each and every air suction the moisture and water vapors in the air are taken into the air compressor. The water vapors get accumulated over years and cause corrosion of the tank of the air compressor. Therefore make sure to remove the excess water collected in the air compressor.
CRAFTSMAN Air Compressor, 6 Gallon, Pancake, Oil-Free with 13 Piece Accessory Kit (CMEC6150K)
This 6-gallon air compressor is a great tool for you to use. Ease of use, value for money, maneuverability, lightness, and noise level are some key features for which this has received good ratings on Amazon.
California Air Tools 2010A Ultra Quiet and Oil-Free 1.0 HP 2.0-Gallon Aluminum Tank Air Compressor, Silver
Here is another recommendation from us for an air compressor. This has plenty of positives. For instance, factors like ease of use, lightness, low noise level, and maneuverability are notable.
Eastvolt 12V Tire Inflator Air Compressor, Multi-Purpose Electric Power, Max 150PSI, with 4-Unit Measurement Gauge, 3 Nozzles, Fast Charger and1.5 Ah Rechargeable Battery
This 1500mAh rechargeable air compressor is easy to start. This pump with LED light is designed like a handgun and may be used at any time of day or night. Ease to use, value for money, battery life, and accuracy are some features this has received good ratings on Amazon.
2. Proper Oiling and Greasing of Tools (Proper Lubrication)
Oils and grease are the two main types of lubricants ideal for electrical tools. Typically a grease is an oil with a thickener added to it. Lubrication reduces the friction between the moving metal surfaces of electrical tools thus minimizing the damage from constant rubbing. Electrical tools that have motion components are ratchets, adjustable wrenches, etc. Proper oiling and greasing are essential for electrical tools as such. The lubricants help to reduce the friction and abrasion among moving surfaces by acting as an intermediate layer in between the moving surfaces.
In addition, a lubricant can serve as a coolant to absorb the heat generated in rubbing surfaces due to friction. A lubricant can prevent corrosion. Hence, sufficient amounts of grease applied on the surface of the electrical tools can provide a variety of benefits to your power tools.
How to Oil and Grease Your Electrical Tools?
- Wipe off the dust and clean your electrical tools as the first step. Get an adequate amount of oil and apply it on the rubbing surfaces of the electrical tool. You can use machine oils or any kind of lubricant available in the stores. Afterward, wipe off the excess oil from the electrical tool.
- Certain electrical tools require the specific type of lubricant mentioned in their manual. Therefore go through the manual prior to applying any lubricant in your electrical tool.
- Coat metal parts in your tools to prevent your metallic tools from rusting. Indeed a minute layer of oil in the metallic regions in your tools can prevent rust and corrosion.
- Do not over apply oils and grease to your electrical tools. Thus it does no good other than wasting oils.
BLACK+DECKER 20V Max Drill & Home Tool Kit, 68 Piece (LDX120PK)
For a range of work, this tool kit is a perfect choice for you to have. This includes a 20V cordless drill with an 11-position clutch that avoids stripping and overdriving screws. The lithium-ion battery is always ready to use and may last up to 18 months on a single charge. This battery-operated drill set comes with 68 hand tools and accessories, as well as a carrying bag for convenient transport and storage. For convenient travel and storage, a carrying bag is included.
3. Proper Storing of Electrical Tools
Storing your tools properly is a must when it comes to maintaining your electrical tools. If the storage location is damp and dusty without proper ventilation your tools are likely to get damaged and corroded. Therefore let’s learn some hacks for storing your electrical tools properly to maintain them easily.
Where to Store the Tools?
Store your tools in a separate place that is reserved for storing tools. This place can be a storage room, a garage, a shed, or a basement. The place where you store your electrical tools should be with adequate temperature, humidity.
Weather Conditions
- Wherever you store your electrical tools it has to be properly ventilated with adequate airflow. Unless the power tools might get corroded or dysfunctional due to higher humidity. You can use a dehumidifier if your home experiences mostly a damp and moist climate, to control the humidity levels in the storage area of electrical tools.
- You can place a heating unit in your tool storage room to manage both the humidity and temperature. That would be highly beneficial for yourself as well as for your electrical tools.
- If you happen to be living in a coastal region there is another threat to your electrical tools. That is the marine salts that flow across the shores and land encompassing heavy loads of salts.
- ‘Corrosion Inhibitors’ can be kept inside the toolboxes and bags to minimize the effect of rust formation on electrical tools. Corrosion Inhibitors prevent the effect of moisture and salts on metallic tools thus, preventing them from corrosion.
- If your tools are placed in a closed toolbox, then you can use silica packets, which is another remedy to minimize moisture accumulation in your electrical tools. In spite of storing in an enclosed box, if you store your electrical tools in open places such as a shelf etc, the effect of silica packets, would be vain.
How to Store Electrical Tools?
Now we know which weather conditions are inappropriate for tools. Ways of knowing how to store tools are one main aspect of maintaining your electrical tools. Proper storing of electrical tools can prevent most of the damages at bay. If you store your tools properly the quality and functioning life span of tools widen. Hence, let’s get to know how to store tools properly.
- An excellent way to store your tools is the use of pegboards. You can hang pegboards on the walls of your garage or shed. In that way, you can keep your tools out of the ground and gain more space for other heavy and bulky tools. Moreover, the use of pegboards to hang electrical tools can add an exceptional look to your workplace. Pegboards make it way easy as well as neat when it comes to the proper storing of electrical tools. The holes in pegboards are used to accept pegs or hooks to support various items and are ideal for tools. Pegboards make your electrical tools easily accessible. Indeed it adds excellent organization and neatness to the garage or shed. You can use a store-bought pegboard or make a pegboard yourself as a ‘DIY project’ during your spare time.
- If possible store your electrical tools and equipment in their original casings and boxes. Most toolsets have a proper casing, bag, or box to store them. Those tool bags or boxes contain belts, buckles, and mechanisms to keep the tools in place. Hence when you carry your tools to construction sites it is advisable to use the original boxes and bags as much as possible.
Some More Methods!
- You can use workbenches with drawers to store your tools. The tools which are not frequently used and are sensitive to dust can be kept in drawers.
- It is essential to be concerned about how to store your tools appropriately. But before storing you should be concerned about cleaning the tools and lubricating them properly. If necessary spay metal protectors on the surface of your electrical tools. Nevertheless, tools may get damaged and corroded fast despite the fact that you stored them in proper places.
- Remove the broken or unusable tools from your tool collection. They occupy the space unnecessarily. If the broken rusted tools are stored along with new tools the rusted tool might accelerate the rusting of the rest of the tools. It is excellent if you can reuse the electrical tools, but if they are damaged beyond repair, dispose the tools so that your tool storage is not overwhelmed.
The storing place can lengthen or shorten the effectiveness of your electrical tools. Therefore store your tools properly to keep them effective and efficient.
Step N Store, Step Stool Tool Box 20″
This step stool toolbox has a reinforced lid. It is lockable and has a nickel-plated steel draw bolt, sure-grip footpads, bottle storage area, and removable tray. Also, the portable design of this step stool box is also commendable.
Keter Rolling Tool Chest with Storage Drawers, Locking System and 16 Removable Bins-Perfect Organizer for Automotive Tools for Mechanics and Home Garage, Black
Rusting, peeling, and denting are all prevented by the weather-resistant polypropylene structure of this. Each drawer is secured before, during, and after usage thanks to a central locking mechanism. The tool chest is movable and convenient for any mechanic to maneuver about the garage for numerous jobs thanks to the easy-to-build caster wheels.
2x4basics 90164 Custom Work Bench and Shelving Storage System, Black
A workbench is a must-have for any garage or workshop when it comes to finishing projects and storing all of your supplies. The work-bench kit with shelf links makes personalizing your work environment easier than ever before, whether you are a seasoned DIYer or just starting started. Factors such as versatility, stability, sturdiness, and ease of assembling are some key factors for which this has received good ratings on Amazon.
4. Inspect Tools for Wear and Damage
It is essential to check your tools from time to time. That is one of the best practices when it comes to maintaining your electrical tools properly.
- Before using inspect the electrical tools for any damage. Then you can find out whether your tools are good enough for use. If there are any breaks or splits in tools they might cause harm to your hands. Check whether the moving parts in tools are properly functional unless you need to clean them to retain their functionality. Check whether the power tools are properly working. It is essential to check for the wire codes in the power tools for any damage.
- Indeed when you plug your power tools check the plugs and switches for any damages.
More Steps!
- The insulation coats of electrical tools can be damaged. Check the handles and body casings of the tools for any cracks or splits. Therefore check the insulated electrical tools thoroughly prior to use. Unless you might get electrocuted from the broken wires.
- You should not keep your electrical tools in the same place for a long period of time. If you do not dust and clean your tools collection properly the dust gets collected on your workbenches and drawers. The tools in pegboards would be covered in dust. This happens as the air carries various particles with it and dust is included in it. Therefore it is natural to have layers of dust on the surface of your tools. Indeed it is essential to dust snd clean your tools to maintain them properly.
If you maintain your electrical tools properly the chance of having to frequently repair your electrical tools is relatively low. Yet, with time the tools get worn out and damaged. Then you need to repair them. Therefore let’s get to know how to repair your electrical tools.
How to Repair Your Electrical Tools?
The method of repairing differs by type of tool. Therefore you should be concerned about what are the appropriate methods of repairing your electrical tool.
The following processes can be done to repair your electrical tools in accordance with the necessity.
- Sharpen the Worn-out Edges
- Remove the Rust
- Repair Damaged Power Tools
Of course, knowing them by name won’t be enough. So, you might be wondering how to really perform these activities. Nothing to worry about, since we are ready to guide you on that as well. Continue reading to get to know all about them.
1. Sharpen the Worn-out Edges
Mostly the sharpened edges of electrical tools get worn out fast. Then you need to repair it to use the electrical tool again.
You can use a file to sharpen the edges of a tool. A file is a tool used to remove fine amounts of material from a workpiece. A file is in the form of a bar or rod with many small cutting edges raised on its longitudinal surfaces. Files are useful in woodworking and metalworking to sharpen and smoothen the tools. The hand files come in different types. The types are recognized by the texture on the hand files.
For sharpening, you can use grinding stones. The rougher the texture the more it will deplete the surface that is being rubbed on it. You can sharpen screwdrivers, wire cutters, pliers in this method.
It is not essential to go to a professional to sharpen your worn-out electrical tools. If you have the proper tools you can sharpen most of them by yourself. Let’s see the procedure.
a) Sharpening Wire Cutters
The sharpening of wire cutters does not require any complicated procedures and equipment. Yet as a precautionary measure wear your safety gloves. If possible wear your safety goggles to protect your eyes. The working area should be spacious and with an adequate amount of light. You can use a file to sharpen the wire cutter. A file with a fine texture would be adequate. If the file is very coarse, it will damage the wire cutter. Then you can start with the sharpening process. Sharpen one blade at a time using the file. Do not apply too much force on the wire cutter.
Next, you have to test the wire cutter for its sharpness. So try to cut a few wires using the newly sharpened wire cutter. If the wire gets cut smoothly without too much force and pressure from your hand, it resembles that the sharpening is successful. If not you need to sharpen your wire cutter a bit more.
Lincoln Electric Heavy Duty MIG/Stick Welding Gloves | Heat Resistant & Durability | Large | K4082-L
The multi-layer lining and heavy-duty leather structure were designed to endure and protect against severe heat. To survive everyday exposure to heat, splatter, or sparks, the glove is designed with a heavy-weight leather exterior, kevlar threading, leather reinforced stress areas and a completely lined inner. The heavy-duty leather can endure greater heat, and the inside foam layer is flame-resistant to protect and extinguish fires. The high-quality leather “breaks in” with use, improving dexterity, while the fleece plus foam hand liner gives a nice, cushioned feel.
Felco Cable Cutter (F C3) – Felco Cable Cutter (F C7) – Heavy Duty Strength Steel Wire One-Hand Cable Cutter with Non-Slip Grip (7mm)
The steel structure of this cable cutter, combined with a non-slip plastic grip, is built to last. For ultimate lifespan, the design contains easily replaceable parts and must be maintained with synthetic lubricant on a regular basis. This cable cutter is made of high-quality steel components that provide outstanding performance and long-term durability. This cable cutter has been created with your hands in mind. The cutter comes with a thumb latch for one-handed use and a soft spring for added comfort.
Klein Tools 63050 Cable Cutters, Heavy Duty High Leverage Cutters for Aluminum, Copper, Communications Cable
This is a precise and easy-to-use tool. This is ideal for working in tight places. Most tool packs will fit this too. And this has cutting surfaces that have been through-hardened rather than case-hardened survive longer. Comfort, durability, value for money and ease of use are some key features this has received good ratings on Amazon.
b) Sharpening Screwdrivers
To sharpen a screwdriver you can use a grinder wheel. Firstly you need to grind the end of the screwdriver to get rid of any nicks and imperfections in it. Each time you re-sharpen a screwdriver we shorten its length. To sharpen the screwdriver, lay its blade against the grinder wheel. Then gently grind away the tip of the screwdriver while checking to verify the taper angle is not changed. Don’t let the screwdriver blade become excessively hot. In this way, grind on both sides of the screwdriver. Next, we need to sharpen the edge of the screwdriver. For that hold the edge of the screwdriver perpendicular to the grinding stone. Then push it gently against the grinding stone to grind out a flat, dull tip to the blade. Next, test your screwdriver and repeat the process if necessary to sharpen more.
Jewellers Tools Screwdriver Guide & Sharpening Stone with Wooden Base: Watchmaker Watch Repair Tool Set (345)
To maintain and repair your electrical tools, this will be of immense importance. This sharpening stone has been created specifically for use with our screwdriver holder. The stone is 150mm x 16mm and removable, and it may be used on both sides.
Bleiou Adjustable Stainless Steel Honing Guide for Wood Chisel Planer Blade Flat Chisel Edge Sharpening (Silver)
We can guarantee the long life of this product. You can adjust the clamping width by rotating the screw cap. The clamping width range is from 9-78mm(0.31-3.1″). The roller is made of brass and stainless steel, and it moves back and forth in the same direction. It is anti-slip, smooth, and safe.
c) Sharpening Electric Drills
You have to use a bench grinder to sharpen a drill bit. Get a firm grip on your drill bit and hold its cutting edge exactly parallel to the front of the grinding wheel. Carefully and slowly move the bit until it contacts the wheel but do not turn or rotate it. Hold the bit against the wheel for no more than four to five seconds. Put the drill bit into the ice water to cool the metal. Once the bit is cool enough to the touch, inspect it to see whether the bit has become sharpened properly on the side you worked. If you are satisfied with the result, turn the drill bit 180 degrees and use the same grind-and-cool procedure to sharpen the opposite side of the bit.
When both edges are sharp and of the same width test the drill bit. You can test it by holding the tip perpendicular to a piece of scrap wood and twisting the bit by hand. Even though you put a slight amount of pressure, a well-sharpened drill bit would be able to create the traces of a hole in the piece of scrap wood. If not, examine the tip of the pit and continue the earlier process.
So you can sharpen the worn-out edges in your electrical tools and reuse them again; Just as the new ones!
Drill Doctor – DD750X 750X Drill Bit Sharpener for High-Speed Steel, Masonry, Carbide, Cobalt, & TiN-coated Drill Bits, with Adjustable Angles from 115° to 140°, Sharpens 3/32in – 3/4in Drill Bits gray/black
This is designed to work with drill bits up to 34 inches in diameter. And this offers additional custom flexibility. Further, this has received excellent ratings for factors like durability, value for money, accuracy, and ease of use on Amazon.
Amesser Knife Sharpener Diamond Wheel – Quickly Sharpen, Honing, Polish Kitchen Knives with 3 Stage Grit 360/600/1000, Anti·Slip Mat and Cut Resistant Glove for Safety (Light Gray)
With a professional 3-stage sharpening technique, this manual knife sharpener uses a diamond grinding wheel to concurrently grind the edges, resulting in sharp, burr-free edges. Its long-lasting, durable structure allows it to instantly recover the blade and cut with ease. In all three steps of the knife sharpening process, absolute diamond abrasives are employed. There is no need to plug anything in; simply place the dull blade in the sharpening slot and you will have razor-sharpness in seconds. Every step that uses diamond surfaces will sharpen your dull knives to a professional level and ensure that they stay sharp for a long time.
2. Remove the Rust
Rusting is another major problem when it comes to repairing tools. But there are mechanisms to cope up with rust and corrosion. Here are some methods and hacks to remove rust from your electrical tools.
a) Using Baking Soda
You can use baking soda, which is available in your kitchen, to remove rust from your electrical tools. First, rinse your metallic tool to remove dirt and dust. Then dry it. Afterward, put some baking soda on the surfaces where rust is formed. Leave the tool for about an hour and then scour with steel wool or a wire brush. When you scrub the rust gets removed. Then rinse the metal with water and towel dry.
Arm & Hammer Baking Soda Fridge-n-Freezer Odor Absorber, 14 oz, Pack of 12
This sturdy spill-proof box ensures that your food tastes as it should. The front and rear panels are detachable, allowing air to circulate through the box for optimum refreshing power. On Amazon, this has received pretty good ratings and reviews.
Arm & Hammer 33200-01670 Baking Soda Shaker, 12 oz., (Pack of 12)
This baking soda is in a more granular, free-flowing form is great for your use. All you need to do is sprinkle this and you are done with your work. With baking soda, you can maintain and repair your electrical tools with ease.
b) Using a Vinegar Bath
The use of vinegar is another best method to remove rust from your electrical tools. Clean your tool to remove dirt and dust. Then submerge it in the vinegar solution and let it sit overnight. Afterward, take out your tool and scrub it with a wire brush or steel wool. If your item cannot be submerged in vinegar use the following method. You can soak rags in vinegar and then wrap the rusty areas of the tool.
30% Vinegar – 300 Grain Vinegar Concentrate – 1 Quart of Natural Concentrated Industrial Vinegar
This product is of supreme quality. Those who have bought this have added positive reviews and comments for this on Amazon.
Bioclean Hard Water Stain Remover 20.3 oz
You can use this to get the commercial and industrial strength that removes stains, spots, and rust. With this, you can remove undesirable hard minerals that have accumulated over time. So, this would to pretty useful to maintain and repair your electrical tools.
Iron OUT Spray Gel Rust Stain Remover, Remove and Prevent Rust Stains in Bathrooms, 16 Ounce
With this, you do not need scrubbing. This is a powerful gel that adheres to rust spots and dissolves them with just a single touch. This removes the hardest rust stains from most surfaces in and around the house quickly and easily.
c) Using Potato and Dish Soap
This is another great home remedy to remove rust from your electrical tool with readily available substances in the home. Take a potato and cut it in half and cover the open surface with dish soap. Then use the soap-covered potato as a scrub to remove the rust from your electrical tool. This hack works well on less rusty surfaces.
d) Using Citric Acid
Citric acid is not something available in your home, but you can easily buy it in pharmacies and cleaning stores, etc. It is a great cleaner when it comes to rust. Add a few inches of hot water to a bowl and sprinkle in 2-3 tablespoons of citric acid to it. Then submerge your rusty tool and let sit overnight. Afterward, remove the tool in the morning and scrub off the lingering rust flecks with a wire brush. Then rinse the tool well and dry it.
You can apply these methods to remove rust from metallic parts in power tools too but use with necessary precautions and care.
3. Repair Damaged Power Tools
It is a common scenario that power tools get damaged more often than hand tools. It happens because the interior of the power tools is complex and contains many electrical components. Once power tools are defective you are left with two options, either to repair them or discard them. In earlier days the repairing was a tedious procedure as replacement parts were not easily available. Indeed, the repair cost was expensive. But now with the advancement of the internet, most of our chaos has become easy work. So does the repairing of most of our power tools.
If you consider any power tool, the mechanical details among drills, routers, or belt sanders may vary. Although, the basic electrical components, such as cords, switches, and brushes, are similar, despite the type of the machine or tool. If a power tool does not start it implies that an electrical component might be broken. So, check thoroughly to trace the broken part. Most power tools die due to defects in the following parts.
- Power cords
- Switch
- Brushes
You can test and examine the wires, switches, and brushes. For testing the only special equipment you would need is a multi-tester which is available in electronic shops.
a) Repairing Power Codes
First, disconnect the cord from the outlet. You have to make sure it is completely unplugged before working on it. Next, inspect the cord for broken wires and other signs of damage. Feel the entire length of the cord to see if the wire is abnormally warm. Search for any breaks in the insulation of the code. Because it could have prevented the code from working. In addition check plug prongs, if they look melted or burned. Mark any damaged areas in the code. If you see a lot of serious damage, you may be better off purchasing a new cord instead of attempting a repair.
You can repair superficial damage by wrapping it with electrical tape. Take the edge of the tape and place it over the broken casing of the power code. Then, wrap the electrical tape around the cord a few times and then you can seal that region. Repair the other damaged portions in the same way and assure that they are well sealed. Electrical tape is a type of black vinyl that resists electricity. Therefore it is good for safely wrapping up cords that do not have exposed wires.
2 Pack Surge Protector Power Strip with 6 Outlets 2 USB Ports 5-Foot Long Heavy-Duty Braided Extension Cords Flat Plug 900 Joules 15A Circuit Breaker Wall Mount for Home Office ETL Listed
This extension code is ideal for your use. This compact power strip has two USB charging ports (5V/2.4A each) and six AC outlets. The 2 USB charging ports with sophisticated technology that share 2.4A power, auto-detect your devices, and charge them at the fastest possible speed.
Digital Energy 25-ft Heavy-Duty 10-Outlet 3500 Joules Surge Protector Power Strip, 25 Foot Long Extension Cord, Two USB Charging Ports, Coaxial, Phone Protection, ETL Listed. 15 AMP, White
Here is another suggestion from us. This has 10 outlets and 2 wide-spaced outlets. And this has an on/off switch with indicator light. Further, this is wall mountable. As this is a good product, we thought of recommending this to you.
10ft Power Strip Surge Protector Tower, NTONPOWER 8 Outlets Surge Protector Flat Plug, 5 USB Desktop Charging Station Circuit Breaker Safeguard for Home Office Dorm Room
This is a surge protector with 8 grounded outlets and 5 USB charging ports that can accommodate up to 13 devices at once. Each layer has its own switch, allowing you to conserve energy while the other outlets are not in use. Meanwhile, the different switches on the power strip occupy very little room on your desk and tidy numerous wires. Of course, this is suitable for a variety of occasions.
Some More Steps to Go!
If the cord is highly damaged so that you can see frayed metal, then you will most probably have to cut the wire to repair it. Electrical tape is suitable for insulating wires to treat superficial damages. You can use duct tape too but the electrical tape is the best option to use here. Because it is specifically designed for electrical components. Next cut the cord on both sides of the damaged portion of the wire code using pliers. You can use end-cutting pliers, lineman’s pliers. Remove both the insulation and wiring. Then repeat the process on the other portion of the code to remove the damaged region.
Next, strip a small portion of insulation out of the cord with wire strippers. Wire strippers are useful to remove the outer casing of the code. Indeed the wire strippers do not damage the wires underneath the insulation. Remove the insulation only for the necessary amount. Take out the wires and remove each of their insulation. You can use the wire stripper for this. Slide the cut insulation off and then it will expose the copper wires. Try to use a wire stripper for the process unless the substitute equipment can ruin the wires. Solder the wires together.
b) Repairing Switches
Sometimes it is due to failures in the switch that the power tools would not work. First, remove the screws and other fasteners which hold the housing of the power tool. The next step is to disassemble the switch. Next, you need to examine the Switch’s Wiring thoroughly. Then draw a diagram for designing the new switch. This is an essential step for replacing the switches in power tools. Accordingly, note down the wire configuration of the switch. The next step is to remove the wires from the old switch. Then you can remove the old switch from the tool. Afterward, install wires into the new switch according to your diagram. Secure the new switch in place and reassemble the power tool.
c) Repairing Brushes
Usually, the power tools contain two small brushes that form part of their motor system. With time brushes can deteriorate in quality and this can eventually prevent the tool from starting in the long run. Use the product number in your power tool to choose the correct brush for your electrical tool. You can buy it from a local store or buy it online. Next, we have to insert the new brush into the power tool. Disassemble the power tool and remove the old brushes. Wipe the interior of the tool if possible, to remove the dust and debris. Then wipe the new brushes and place them inside the tool. Next, assemble the power tool properly and test whether it works.
Don’t Throw Away Electrical Tools; Try to Maintain, Repair, and Reuse!
With a little bit of effort and money, you can bring back your power tool to life. Therefore try to repair the broken power tools. Indeed most of the time it is way cheaper than buying new power tools. When it comes to rusting you can remove the rust easily even with home remedies. You can sharpen the worn-out tools. Then your tools are good to go, again! It would save you from spending money on new electrical tools often.
On the other hand, repair and reuse make you thrifty and economical. In addition, removing electrical tools from your toolbox means piling of electrical waste. As per the U.S Bureau of Labor Statistics, the electrical profession is to grow at a rate of 8% within the period of 2019 to 2029. Accordingly, as the number of electricians increases, there is no doubt that electrical waste increases as well. Hence, the reuse of tools would contribute to reducing the electrical waste which gets piled up day by day, thus saving the earth.
Maintain and Repair Your Electrical Tools!
You might be a professional electrician, or a person interested in becoming an electrician. You might be using essential electrical tools at home, budget electrician tools, or tools for the craftmanship of electricians. Whoever you are, and whatever the tools you use, your electrician tools play a vital role in making your work perfect. Therefore remember, if you properly maintain and your electrical tools, the necessity of repair is less. Also, they would avoid electrical hazards as well.
Therefore try to maintain and repair your electrical tools properly. The process of keeping the good quality of your electrical tools needs you to constantly maintain them and, repair them if necessary. It is a process that has to continue, as long as you use the tools. As an electrician, your electrical tools can either lift you up or degrade the quality of your work! Therefore maintain and repair them properly, and take good care of your electrical tools!
One comment in this post